22 February 2019

Frost on Trees at Smiley Canyon, February 22, 2019

Frost on trees at Smiley Canyon in Fort Robinson State Park, February 2019. (Photo by Daniel Binkard)

Smiley Canyon Scenic Drive winds between the hills, a great Sunday drive. There are good stopping points for photos throughout the route. The foreground trees here are on the flatter part before the hills really start. Normally, the landscape is brown and gray this time of year, but a layer of frost creates a whole new world. I counterbalance the round shapes of the trees with the S-curve of the road and strong angle of the rising hill beyond it. Some fog adds atmospheric perspective. I'm enjoying the warm tones from the foreground grass, which gets repeated here and there throughout the scene.

Cold trees and hillside viewed from Smiley Canyon in Fort Robinson State Park, February 2019. (Photo by Daniel Binkard)


13 February 2019

Lightroom Enhance Details Test Cases

The February 2019 update for Adobe Lightroom featured the Enhance Details tool, which allows photographers to vector in on fine patterns and demosaicing problem areas. Fine details have a better chance of being extra finely detailed. I was excited to see what this new tool could do for some of my old work. I thought of three examples that were worth testing.

Test Case 1: Veterans Memorial Bridge

Veterans Memorial Bridge, Sioux City, Iowa. Nikon D70 with AF Nikkor 50mm f/1.8D.
Veterans Memorial Bridge, Sioux City, Iowa. Nikon D70 with AF Nikkor 50mm f/1.8D. (Photo by Daniel Binkard) Click to view full size.
On a sunny August day in 2004, I went on a photo shoot with my dear mom at Larsen Park in Sioux City, Iowa. One of my photographs of the bridge showed moiré patterns on the support cables that carry the road from the overhead arch.


Processed in dcraw with -d flag, cropped.
Processed in dcraw with -d flag, cropped. Click to view full size.
Processed in dcraw with -D flag, cropped. Click to view full size.
The first two samples are using what are essentially dcraw utilities. The -d and -D flags are grayscale versions. The -d flag has no interpolation; the -D flag has no interpolation and shows the original unscaled pixel values. See the dcraw man page for details on all of the demosaic possibilities.


Processed in dcraw with -h flag, cropped. Click to view full size.
The -h flag in dcraw creates a half-size color image. Without taking the time to read the manual, I will make a manly (i.e., clueless) assumption that a half-size interpolation is made by averaging every four RGGB pixels into a single pixel and algorithmizing an approximatized semi-correct color. That's the way they teach it at Harvard Medical School.


Processed in dcraw with -q 0 flag, cropped. Click to view full size.
The -q 0 (zero) flag in dcraw creates a full-resolution color image using bilinear interpolation. This is about as quick and dirty as you can go with demosaicing to get all of the megapixels you paid for. Note the sawtooth moiré patterns that are visible on most of the cables and even some of the more solid edges. Diagonals don't suffer as much, but anything close to horizontal or vertical gets hit.


Processed in dcraw with -q 1 flag, cropped. Click to view full size.

The -q 1 (one) flag in dcraw creates a full-resolution color image using Variable Number of Gradients interpolation. The rest of the examples will be full-resolution color images, so I don't have to repeat that every time. An offhand observation I made was that VNG interpolation took longer to process than the higher-quality PPG interpolation. Might have been a transient processing spike from a YouTube video in the background, though. This is close to what I saw in 2004, when I was processing raw files with a dcraw front end, such as UFRaw. I believe it wasn't long after that the front ends gained the ability to specify which interpolation algorithm to use.


Processed in dcraw with -q 2 flag, cropped. Click to view full size.
The -q 2 (two) flag in dcraw creates an image using Patterned Pixel Grouping interpolation. This does a fine job with most of the straight lines, but if you look carefully at the intersections of cables and horizontal structure elements, you'll see tiny artifacts. These will appear again below.


Processed in dcraw with -q 3 flag, cropped. Click to view full size.
The -q 3 (three) flag in dcraw creates an image using Adaptive Homogeneity-Directed interpolation. This is slower than VNG, again by my rough estimation, but I do remember reading this warning back in 2004. AHD clears up the last of the artifacts, even keeping the intersecting edges clean. In that respect, it's better than what Adobe is doing with their normal demosaic routine.


Embedded JPEG from NEF, with crop and exposure, contrast, saturation adjustments. Click to view full size.
For fun, here is the embedded JPEG with the original D70 demosaic routine. It's fairly clean, aside from JPEG compression artifacts. There is some slight moiré on the cables, and some artifacts where the cables meet the horizontal structure. These artifacts take the form of one- or two-pixel offsets at the intersection. They will appear again.


Processed in Adobe Camera Raw, Process Version 5, Adobe Neutral profile. Sharpening, crop and exposure, contrast, saturation adjustments. Click to view full size.
The modern Adobe Camera Raw demosaic is not terribly different than PPD interpolation. It's probably using that very algorithm as a starting point. The same nit picky little artifacts appear at the intersections.


Processed in Adobe Camera Raw “Enhance Details,” Process Version 5, Adobe Neutral profile. Sharpening, crop and exposure, contrast, saturation adjustments. Click to view full size.

The February 2019 Enhance Details tool takes quite a while to process, because it uses a neural-net processor, a learning computer, some sort of evil witch's brew of custom interpolation. I know, it applies AHD to the busy areas and PPG to the clear areas. Edges and intersecting areas clean up nicely. I was hoping for clean support cables, free of magenta/green color casts, but that's not happening. However, the more I look at the differences between the regular ACR demosaic and this one, I find more good details that it brings out.


Processed in Adobe Camera Raw, Process Version 5, Adobe Neutral profile. Sharpening, crop and exposure, contrast, saturation adjustments. Local adjustment brush with Moiré at +100 applied to support cables. Click to view full size.
Going back to the regular Version 5 processing on the NEF. This time I used a small Adjustment Brush, painting over each pair of support cables with the Moiré +100 setting. When Adobe does de-moiré, it blurs color information. Used judiciously, this is often not an issue, but note where the support cable intersects with the cloud at the top of the image. I was sloppy with my brushwork, hitting some of the cloud along with the cable. It's entirely possible to go back in and fine-tune the brushwork to clean up this kind of side effect.

Is the Enhance Details version worth the time and disk space?

Based on what I'm seeing, in this case it is not worth the time. The original NEF is 6 MB. The enhanced DNG is 30.5 MB. It is not worth the disk space. However, keep this tool in mind for pulling out the last bits of detail in images like this. It's amazing how much detail can end up in these old six megapixel files.


Test Case 2: Yaquina Head Outstanding Natural Area

Yaquina Head cobblestone beach, Newport, Oregon. Nikon D2x with AF-S Zoom-Nikkor 18-70mm f/3.5-4.5G. (Photo by Daniel Binkard) Click to view full size.

On a warm July day in 2012, I ventured up to Yaquina Head Outstanding Natural Area at Newport, Oregon, which features a cobblestone beach and plenty of life to see in the tidepools. This scene is remarkable for the moiré in the hillside staircase.


Processed in dcraw with -d flag, cropped. Click to view full size.
Processed in dcraw with -D flag, cropped. Click to view full size.
As before, the -d and -D flags are grayscale versions. The -d flag has no interpolation; the -D flag has no interpolation and shows the original unscaled pixel values.


Processed in dcraw with -h flag, cropped. Click to view full size.
The -h flag in dcraw creates a half-size color image.
 
Processed in dcraw with -q 0 flag, cropped. Click to view full size.

The -q 0 flag in dcraw creates a full-resolution color image using bilinear interpolation. This is about as quick and dirty as you can go with demosaicing to get all of the megapixels you paid for.
 
Processed in dcraw with -q 1 flag, cropped. Click to view full size.

The -q 1 flag in dcraw creates an image using Variable Number of Gradients interpolation.


Processed in dcraw with -q 2 flag, cropped. Click to view full size.
The -q 2 flag in dcraw creates an image using Patterned Pixel Grouping interpolation.


Processed in dcraw with -q 3 flag, cropped. Click to view full size.
The -q 3 flag in dcraw creates an image using Adaptive Homogeneity-Directed interpolation.


Embedded JPEG from NEF, cropped. Click to view full size.
For fun, here is the embedded JPEG with the original D2x demosaic routine. It's fairly clean, aside from JPEG compression artifacts. Nikon's internal processing shows strong generational improvements when comparing the D2x to the D70. Moiré is fairly well controlled.


Processed in Adobe Camera Raw, Process Version 5, Adobe Neutral profile. Sharpening, crop and exposure, contrast, saturation adjustments. Click to view full size.

The modern Adobe Camera Raw demosaic is again not terribly different than PPD interpolation. In some areas Adobe's processing deals with the artifacts better; in some areas dcraw's PPD works better.


Processed in Adobe Camera Raw “Enhance Details,” Process Version 5, Adobe Neutral profile. Sharpening, crop and exposure, contrast, saturation adjustments. Click to view full size.

The results of the Enhance Details tool make for an interesting comparison. In a few subtle areas it is an improvement over the other demosaic routines; but overall the results are worse. Sawtooth edges make an appearance where they didn't before.


Processed in Adobe Camera Raw, Process Version 5, Adobe Neutral profile. Sharpening, crop and exposure, contrast, saturation adjustments. Local adjustment brush with Moiré at +100 applied to staircase. Click to view full size.

Going back to the regular Version 5 processing on the NEF. This time I used the Adjustment Brush, painting over almost the entirety of the staircase with the Moiré +100 setting. The saturation loss from chroma blur makes an appearance, but once again the target area is not colorful to begin with. A side effect is that I can also remove any vestiges of chromatic aberration that the Camera Raw processing didn't clear up. Note the red edges on the diagonal banisters in the earlier examples; those are gone in this version.

Is the Enhance Details version worth the time and disk space?

Based on what I'm seeing, in this case it is not worth the time. The original NEF is 12.1 MB. The enhanced DNG is 59.8 MB. It is not worth the disk space.


Test Case 3: Toadstool Geologic Park

Toadstool Geologic Park hoodoos, Crawford, Nebraska. Nikon D70 with AF-S Zoom-Nikkor 18-70mm f/3.5-4.5G. (Photo by Daniel Binkard) Click to view full size.

On a September evening in 2006, I went with a group of friends to explore Toadstool Park at night. I brought my flash and some colored gels to work with colored light painting. These hoodoos are lit by several flash pops through a red gel over the course of a three minute exposure. Lighting like this is severely taxing for a Bayer demosaic routine, because most of the data is contained only in the red pixels. That is, only about one-quarter of the available pixels are collecting useful data, so it's kind of like shooting with 1.5 megapixels instead of 6.
Processed in dcraw with -d flag, cropped. Click to view full size.
Processed in dcraw with -D flag, cropped. Click to view full size.
As before, the -d and -D flags are grayscale versions. The -d flag has no interpolation; the -D flag has no interpolation and shows the original unscaled pixel values.


Processed in dcraw with -h flag, cropped. Click to view full size.
The -h flag in dcraw creates a half-size color image.


Processed in dcraw with -q 0 flag, cropped. Click to view full size.
The -q 0 flag in dcraw creates a full-resolution color image using bilinear interpolation. This is about as quick and dirty as you can go with demosaicing to get all of the megapixels you paid for.


Processed in dcraw with -q 1 flag, cropped. Click to view full size.
The -q 1 flag in dcraw creates an image using Variable Number of Gradients interpolation.


Processed in dcraw with -q 2 flag, cropped. Click to view full size.
The -q 2 flag in dcraw creates an image using Patterned Pixel Grouping interpolation.


Processed in dcraw with -q 3 flag, cropped. Click to view full size.
The -q 3 flag in dcraw creates an image using Adaptive Homogeneity-Directed interpolation.


Embedded JPEG from NEF, cropped. Click to view full size.
For fun, here is the embedded JPEG with the original D70 demosaic routine. The JPEG compression kills quite a bit of detail in the red areas, resulting in a soft mess.


Processed in Adobe Camera Raw, Process Version 5, Adobe Neutral profile, cropped. Click to view full size.
The modern Adobe Camera Raw demosaic is cleaner than the VNG and PPD samples. Adobe must have some black magic going on behind the scenes to treat large colored areas like this. Note how the internal shadow lines in the red areas are a bit smoother in this sample.


Processed in Adobe Camera Raw “Enhance Details,” Process Version 5, Adobe Neutral profile. Sharpening, crop and exposure, contrast, saturation adjustments. Click to view full size.
Of my three test cases, this is the most obvious example of the Enhance Details tool resulting in an improvement. Definition is improved across the red areas, particularly where edges meet the sky. The original Camera Raw demosaic has blocky edges here and there, and color blurring along edges. These artifacts are greatly mitigated in the enhanced version. I also tested sharpening in Camera Raw, not shown in these samples, and it highlights the differences even more.

Is the Enhance Details version worth the time and disk space?

Based on what I'm seeing, in this case it is worth the time. The original NEF is 5.5 MB. The enhanced DNG is 25.8 MB. It is worth the disk space. 


Comments

As recommended by Adobe and 152,000 photography websites and YouTube channels, the Enhance Details tool is a worthwhile addition to the photographer's toolbox. When used on the right photo, it is capable of extracting additional details and cleaning up problem areas. Test it on your occasional portfolio photo, keep if needed, otherwise save the disk space.

09 February 2019

Square Photos at Lake McConaughy and Lake Ogallala, February 9, 2019


Tree overlooking the shore at Lake Ogallala State Recreation Area, February 2019. (Photo by Daniel Binkard)

Ice and snow at Lake Ogallala State Recreation Area, February 2019. (Photo by Daniel Binkard)

Tracks in the snow at Lake Ogallala State Recreation Area, February 2019. (Photo by Daniel Binkard)

Shoreline grass at Lake Ogallala State Recreation Area, February 2019. (Photo by Daniel Binkard)

Shadows at Lake Ogallala State Recreation Area, February 2019. (Photo by Daniel Binkard)

Snow patterns at Lake Ogallala State Recreation Area, February 2019. (Photo by Daniel Binkard)

A bit of rope on the shore at Lake McConaughy, February 2019. (Photo by Daniel Binkard)

Trees on the shore at Lake McConaughy, February 2019. (Photo by Daniel Binkard)

Trees on the shore at Lake McConaughy, February 2019. (Photo by Daniel Binkard)

Trees on the shore at Lake McConaughy, February 2019. (Photo by Daniel Binkard)

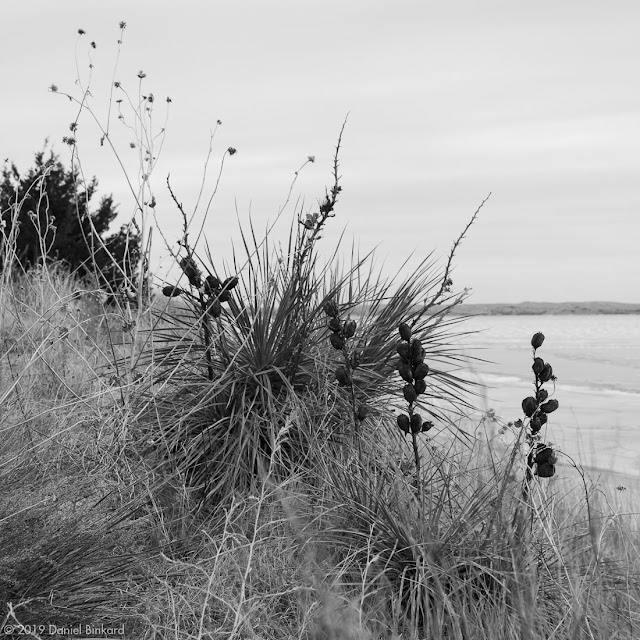
Yucca on the shore at Lake McConaughy, February 2019. (Photo by Daniel Binkard)

Equipment cover at Lake Ogallala State Recreation Area, February 2019. (Photo by Daniel Binkard)

Tiny dinosaur prints at Lake Ogallala State Recreation Area, February 2019. (Photo by Daniel Binkard)